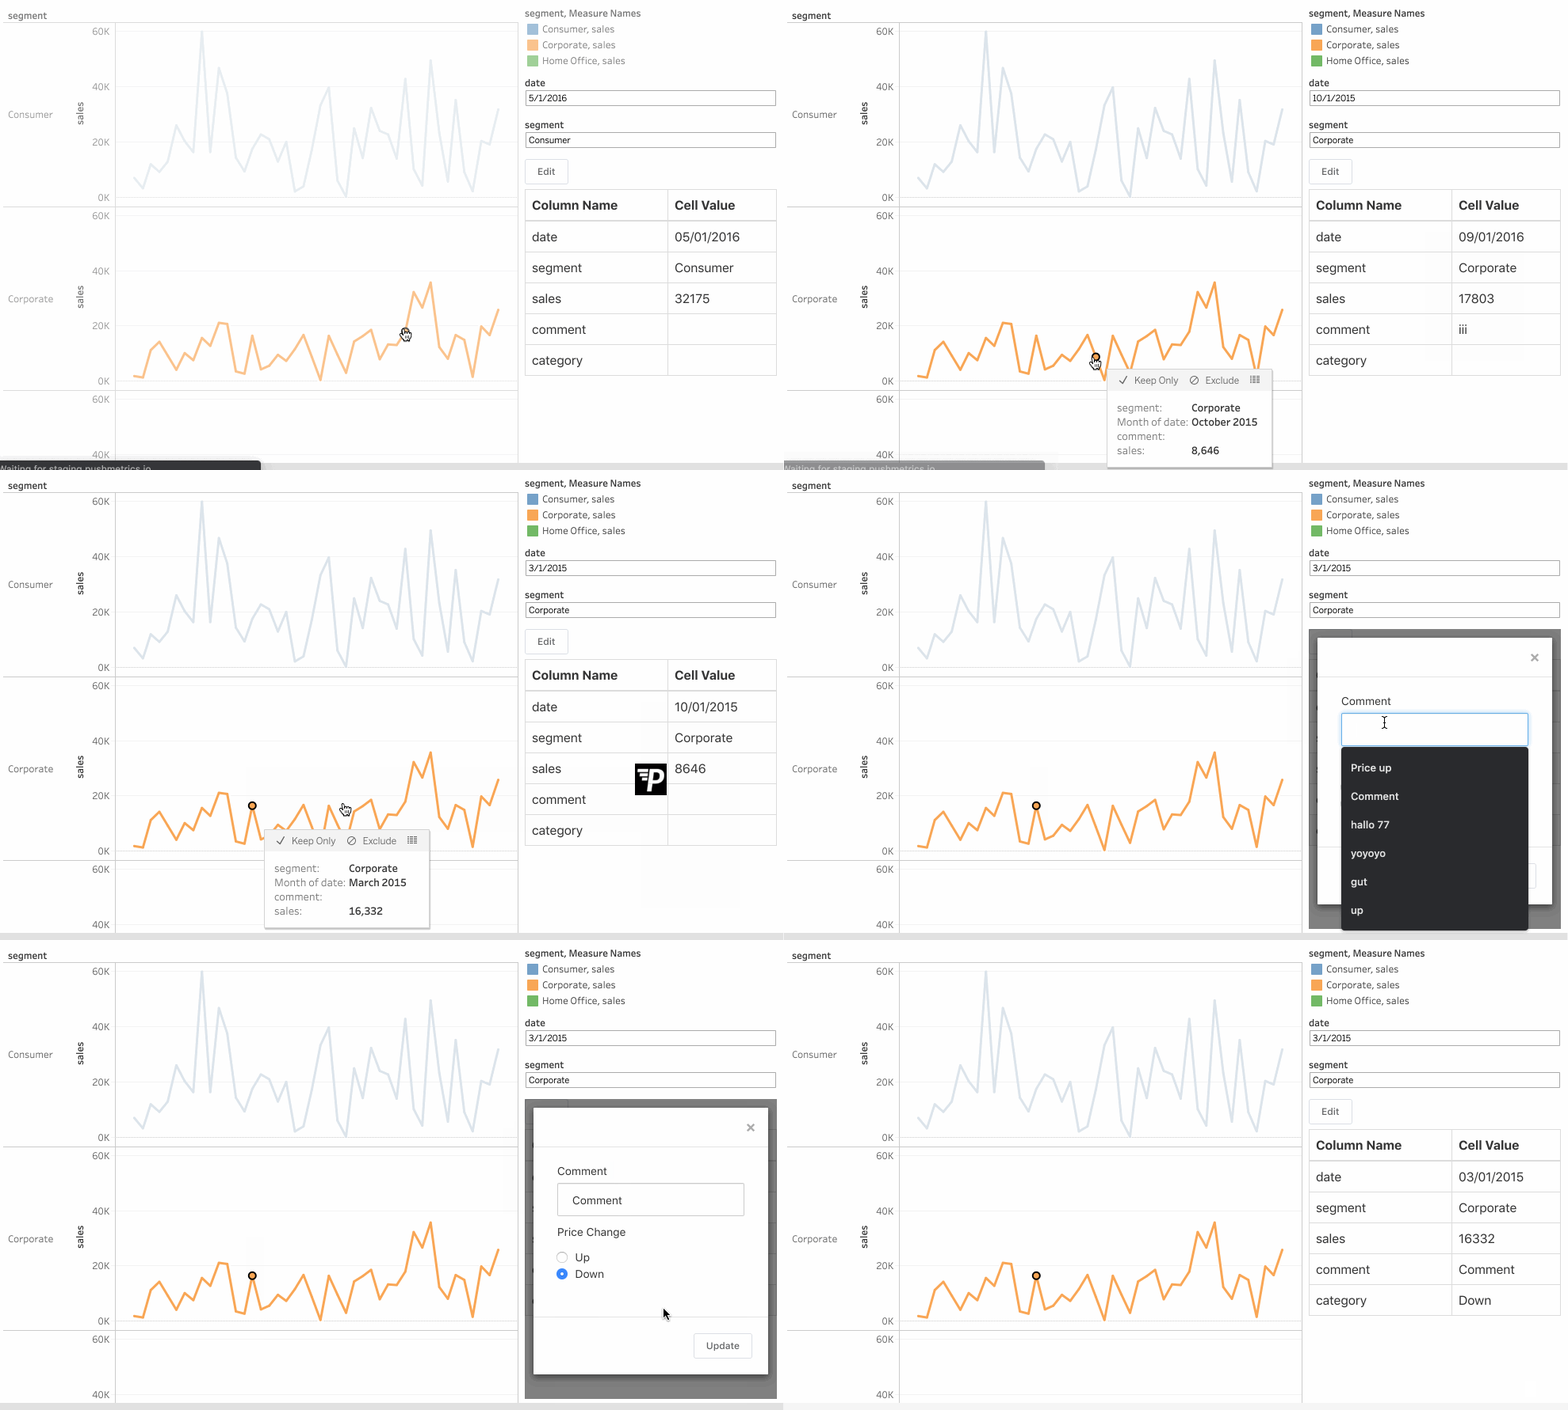
Traditionally, Dashboards and Charts are one-directional, read-only.
Using the Data Entry implementation makes it possible to construct a form that allows its users to edit rows in a table, according to conditions that you pre-define.
This implementation may then be embedded into a Tableau Dashboard, enabling you to edit a row in your data right there in you dashboard.

Potential Use Cases:
- Commenting / Annotating Dashboards, Charts or even individual data points, e.g. highlighting reasons for a drop in revenue, etc.
- Providing Team Members that are not Data experts with a supervised access to editing data.
- Building simple Admin dashboards to manage users, inventory, etc.
- Maintaining a recipient list in your date for Mail Merge Reports
In order to be able to use the data entry tool a couple pre-requisites must be met.
- Full control of an SQL Table that is accessible from the internet.
- An editable table created in PushMetrics.
- A Tableau dashboard with PushMetrics embedding and Parameter Actions configured.
In Short:
-
Set up a database connection in PushMetrics.
-
Create a new table in your database.
Note: Your Table must include all Rows. You cannot add rows using the data entry tool. -
Create a Dataset in PushMetrics, pointed to a single table or view.
-
Explore Dataset in Superset and pick the “Editable Table” as visualisation.
-
Set up your view. What Columns will be displayed?
-
Choose your Primary Key. How is the edited row identified?
-
Choose the editing mode. What does editing in the final form look like?
-
Configure your editing form. What changes can a user make in your Table?
-
Choose which options of Create, Edit, and Delete are available.
-
Enable Tableau embedding and choose linking parameters.
-
Create an extension file for Tableau.
-
Create a Tableau Dashboard with action parameters and add the extension.
-
Lastly, give the PushMetrics user the correct Permissions to make changes in the Datasource.
